A visual guide to mounting the 4099 Instrument Microphone on various instruments.
Use the links below to jump down to a specfic instrument you are interested in.
Mount with a Bass clip
Mount with Brass clip
Mount with a Cello clip
Mount with a Drum clip
Mount with a Guitar clip
Mount with a Piano clip
Mount with a Saxophone clip
Mount with a Universal clip
Mount with a Violin clip
General application notes
Using DPA adapters
Secure the gooseneck by sliding the fixation part over the grip.Mount the
4099B on the bass by attaching it on the two outer strings between the bridge and the tailpiece. Let the holder curve inwards. Adjust the gooseneck and microphone angle to your desired taste.
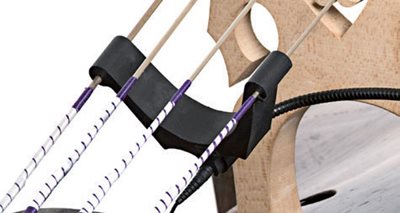
Secure the gooseneck by sliding the fixation part over the grip.
The
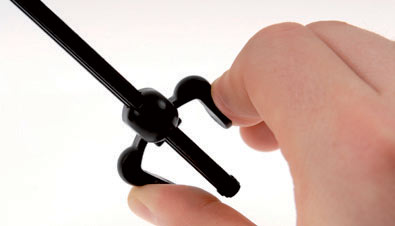
4099T can be easily readjusted and moved to another instrument by using just one hand. Squeeze the two clamp knobs on the clip to expand it, mount on the instrument, and then release. It will now fit the shape of the instrument. This will vary depending on the required instrument and playing style. The gooseneck can flex in all directions. Bend the gooseneck to fit the natural curves of the instrument.
For trumpet, trombone, and instruments of similar sizes: For the smoothest sound, do not point the microphone directly into the center of the bell, but position it between the center position and the bell’s edge. All types of mutes can be used together with the 4099.
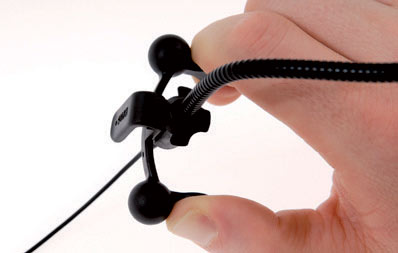
Secure the gooseneck by sliding the fixation part over the grip.
Mount the
4099C on the cello between the bridge and the tailpiece. Attach it on the two outer strings, let the holder curve outwards. Adjust the gooseneck and microphone angle to your desired taste. For the most natural sound: below the bridge, between instrument top (belly) and strings. For the highest output: angled to one of the f-holes.
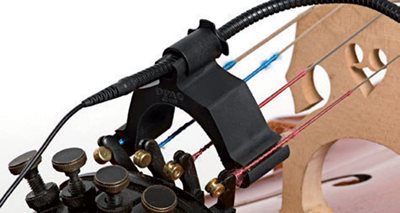
Secure the gooseneck in the holder. The gooseneck securing part can be angled 90° offering maximum placement possibilities. Detach the part from the clip and re-mount it turned 90° for a horizontal gooseneck arm. The
4099D fits most drums and percussion instruments and can be mounted two ways, either upwards or downwards.
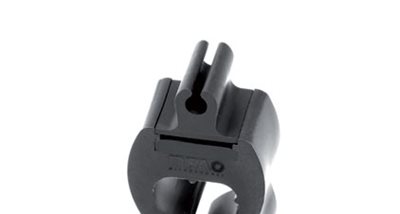
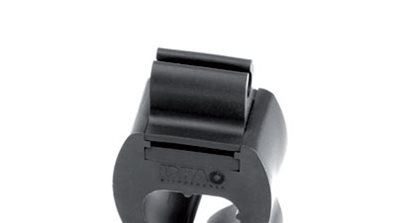
Upward-turning clip positioning allows for mic placements across the drum skin and will be the most typical live application choice for rock. Point the microphone to the middle of the drum to get more low-end richness and attack or to the edge to get more overtones. Downward-turning clip positioning allows for mic placements a little further away from the drum and will be a preferred choice for most invisible placements suitable for TV productions. Sonically, this position will also often be the choice for jazz.
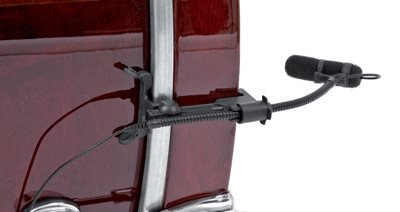
A snare drum may benefit from a two-microphone setup, one on top and one below the drum; the upper mic will focus on the “in-your-face” punch and the lower mic on the snare high-frequency bite from below the drum. Shift polarity on one of them and blend them in the desired balance.
The
VC4099 clip (optional accessory) also fits the bass drum rim. The bass drum, too, can benefit from a two-microphone setup, one on the stroke side and one on the front side. Shift polarity on one of them and blend them in the desired balance, controlling the “kick” sound and the low frequency component.
Choose the desired gooseneck height and place it in the grip. Secure the gooseneck by sliding the fixation part over the grip. The height of the
4099G clip can easily be adjusted to fit a wide variety of stringed instruments with a body depth between 35 mm (1.4 in) and 122 mm (4.8 in). Press the lock on the side of the clip to increase height. Place the clip in its maximum position on the instrument, and reduce the height to fit the instrument by pressing the parts firmly together.
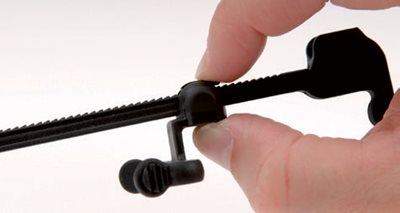
The 4099G can be easily readjusted and moved to another instrument by using just one hand. Squeeze the two clamp knobs on the clip to expand it, mount on the instrument, and then release. It will now fit the shape of the instrument. This will vary depending on the required instrument and playing style.
A recommended miking placement for the most balanced sound is where the fretboard meets the body, typically above the 12th fret. For optimum volume, point the microphone toward the sound hole. A blend between your guitar’s pick-up and the 4099 condenser microphone is often a good choice on stage. This can provide even more gain before feedback while keeping a natural guitar tone. The optional DAO4099 Double Cable will reduce cable clutter.
Secure the goosenecks in the holders by sliding the fixation part over the grip. Place the holders in the piano frame and adjust the microphone angle to preferred sonic taste. The
4099P can be spaced apart, angled apart, or both.
Sensitivity selection tolerance for pair: ±1 dB at 1 kHz. Any 4099P microphone within this sensitivity tolerance is marked with a white dot on the gooseneck fixation part.
Secure the gooseneck by sliding the fixation part over the grip. The
4099S can be easily readjusted and moved to another instrument by using just one hand. Squeeze the two clamp knobs on the clip to expand it, mount on the instrument, and then release. It will now fit the shape of the instrument. This will vary depending on the required instrument and playing style.
For a round and warm character on the soprano sax, place the 4099S as far away from the bell as possible. Place it in front of the bell for a harder sound with more bite.
To create the most balanced sound on the alto, tenor or baritone sax, do not point the microphone directly into the bell, but angle it between the bell and the keys. In this way you will obtain a nice blend from the two sound components of the saxophone.
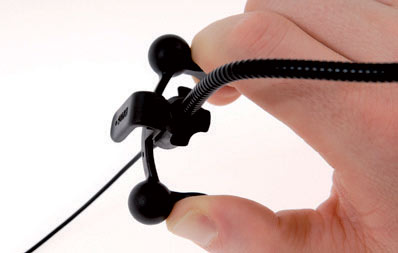
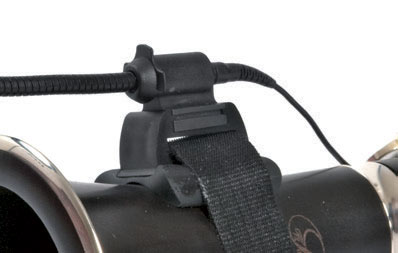
Secure the gooseneck in the holder by sliding the fixation part over the grip.T he gooseneck securing part can be angled 90° offering maximum placement possibilities. Detach the part from the clip and re-mount it turned 90° for a horizontal gooseneck arm.
Close-miking instruments like oboe, clarinet, soprano saxophone and with the
4099U bassoon calls for a certain care in the placement and angling of the microphone. The 4099 holds a supercardioid directionality and may end up creating an uneven timbre.
Tip: Create as much distance as possible with the gooseneck and place the mic head above the bell. Twist it backwards to the instrument and point it towards the upper joint (the keys closest to the mouthpiece). In this way the entire instrument range will be covered most naturally.
Place the hook-and-loop fastener around the instrument and insert the end into the opening below the gooseneck. Tight firmly if necessary by pushing the holder at the same time.
The height of the VC4099 Violin Clip can easily be adjusted to fit a wide variety of stringed instruments with a body depth between 35 mm (1.4 in) and 55 mm (2.1 in). Press the lock on the side of the clip to increase height. The gooseneck can flex in all directions. Bend the gooseneck to fit the natural curves of the instrument.
Most players prefer the
4099V to be placed on the left side of the instrument to avoid restricting the player’s movement. Point the microphone away from the performer’s head to avoid breath noise.
For optimum volume, point the microphone toward the f-hole. Please note that this also makes the sound character a little duller, which may or may not suit your taste. If not, point the microphone at the bridge.
- Always use the 4099 in its dedicated foam windscreen and shock absorbing rubber mounts
- When running wireless, it is recommended to use a low-cut filter at 80 Hz in the transmitter to avoid handling and moving noise. This low-cut filter is built into the DAD4099-BC XLR adapter supplied with 4099G, 4099V, 4099S and 4099T
- The optional DMM0007 Universal Surface Mount can be useful to control the cable run along the instrument
- Tip: The same gooseneck microphone boom can be used with alternate clips that are specific to each instrument
- Bear in mind the difference in mic sensitivity according to different instruments’ sound pressure levels
All 4099 cables are terminated with a MicroDot connector at the end of the gooseneck. When used in conjunction with our range of over 35 adapters, the MicroDot connector provides the ability to connect to virtually all available pro wireless systems.
Various wireless systems require the use of electronics inside the adapter to optimize the signal level, the DC offset, and powering of the built-in microphone preamplifier. Using the adapters from DPA ensures the correct electronic circuit with the listed types of wireless systems (dpamicrophones.com/adapters).
The included XLR adapter allows the 4099 to work as a regular 48V phantom-powered microphone. The belt clip can be removed and replaced with the enclosed ring for use of the adapter directly in stage boxes or mixing consoles: Dismount the cap of the adapter, remove the belt clip and place the black ring instead. Remount the cap.
Do not attempt to employ non-standard adapters or connectors as you might damage the microphone.
A connector-tightening tool is supplied with each adapter and should be employed whenever the MicroDot connector needs to be tightened. Utilize the tightening tool before making use of the mic to ensure the connection is secure and that the cable cannot rotate by the cable relief.
The
DAD4099-BC adapter features a permanent second-order low-cut filter at 80 Hz. The filter minimizes handling and wind noise at the microphone output without compromising sound quality, as guitar, sax, trumpet and violin have no appreciable frequency response below 80 Hz.