How to mic a piano
Guidelines for miking a piano. Grand or upright.
This article features information about the piano, upright and grand, as well as guidelines on miking the instrument and suitable placement options depending on the situation you are working in.
Great sound is subjective, so the miking methods described in this article are suggestions only. Try these methods out but make sure to listen and choose the best solution for your specific situation.
An acoustic instrument’s sound is usually designed to be experienced at a distance so that all the different elements of the sound are naturally blended into perfect harmony. Often, mounting a microphone directly on the instrument is the most practical solution but close-miking an instrument is often considered to be a compromise to the instrument’s true acoustic sound.
Finding and placing the microphone in the instrument’s sweet spot – or your preferred location – can be a challenge.
The piano as an instrument
A concert grand piano is among the largest and most versatile acoustical instruments in the world. Spanding from the lowest key on an 88 key piano A0 27 Hz to the highest C8 at 4.2 kHz. The piano also delivers a very wide dynamic range, from the softest barely audible notes to the loud transients with more than 130 dB close to the hammers. To capture the full frequency range naturally and evenly across the entire spectrum, you need accurate microphones, both on- and off axis, as sound and reflections from all angles are important for the result.
If you are close miking, the room has less influence on the sound, but if you are including the room acoustics there are more considerations. The room is often as unique as the grand piano in it, and since it is such a large instrument, it interacts differently from room to room.
A concert grand piano was originally designed for playing in large concert halls where the acoustics have a significant role in the overall experience. Originally, the grand piano, and its predecessors, were placed at floor level – the same level as the sitting listeners, and the angle of the lid was therefore designed to amplify the sound horizontally. Modern concert halls have an elevated stage, so the angle of the lid is reduced accordingly, now often using a shorter stick so the reflections reach the audience, now at an angle slightly below the stage.
Solo or isolated piano
Acoustically, the grand piano can be considered a full orchestra so, if your goal is to capture the full experience of the piano, as if you are the audience in the hall, the best placement is outside the piano, relatively low. Alternatively, you can raise the lid a bit more so that the reflections reach the microphones. The full spectrum of the audio needs to be captured in an enveloped format – stereo at minimum. More often nowadays, recordings are made with a full immersive pick-up, from 5.1 to larger scale 7.1.4 and even higher.
Omni microphones are often chosen for this situation as they do not suffer from proximity effect and due to their nature, they capture the room as well as the instrument. An AB placement with a pair of omnis just outside the piano on a microphone stand spaced 30 cm (12 in) apart is a particularly good starting position.
DPA solutions
The 3506A Stereo Kit with Matched 4006A Omnidirectional Microphones or 3532-SP Stereo Kit with Matched 4041-SP Omnidirectional Microphones are excellent choices for this situation. Another good, affordable solution is a stereo pair of 2006 Twin Diaphragm Omnidirectional Mics.
Live stage/orchestra pit piano
For situations where the piano is on a stage or in the orchestra pit with neighboring sound sources, you probably need to place the microphones closer to the piano to capture more of the direct sound and less of the acoustics and the room. Using directional microphones inside the piano will exclude even more of the acoustics, and result in an even more percussive sound. Placements like A/B, X/Y or ORTF in the arch in the middle of the grand piano with directional microphones.
In acoustic environments where the piano is just a part of the overall mix, such as in big bands, when other instruments are near or when monitoring systems are playing very loud on the stage, the ideal solution is to provide higher isolation with narrower microphone patterns and closer placements. Closing the piano lid or choosing a short stick is also useful for separation.
DPA solutions
4011 Cardioid Microphones or 2012 Compact Cardioid Microphones are useful solutions in stage or orchestra pit scenarios. A fantastic alternative is a wide A/B set up with wide cardioid mics like 4015 Wide Cardioid Microphone or 2015 Wide Cardioid Microphone placed inside on the frame at either end of the piano on magnet mounts, which delivers an extraordinarily rich and wide stereo image. Omni mics like 4006 Omnidirectional Microphones or the larger 4041 Omnidirectional Large Diaphragm Microphone closer to the hammers will give a great deal of direct sound, but also the richness of the entire piano.
In acoustic environment where the piano is part of the overall mix, a clip microphone allows flexible and close placement without needing to fight with stands. The DPK4099 CORE+ Piano Stereo Kit, DPK2015 Piano Stereo Kit or DPK4011 Piano Stereo Kit are all good choices for this application since they all have a low profile and mounting options with shock-mounts and magnets.
Hidden or discreet miking
For situations where the piano is on a stage or movie set and the microphones need to remain unseen, miniature mics are a good solution. When done right, these mics can be hidden in plain sight, even with the lid open. There are a few very discreet options for mounting:
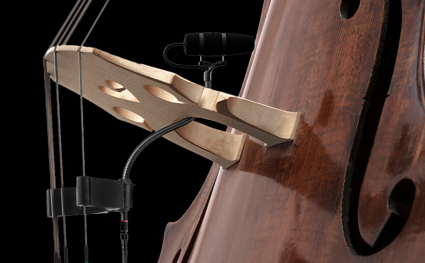
• Place the miniature mics on small magnetic mounts and place them in or near the sound holes of the piano. Place at the high hole and another towards the last (or second to last) octave of low strings. This is also a good placement for recording or for front of house and monitor mixes since the level of the direct sound from the piano is relatively loud.
• Mount two miniature mics on the surface inside the open piano lid to get a natural sound for recording. The pressure zone technique will “draw in” and capture the natural timbre of the piano, while at the same time be very discrete in appearance. Using the PZM technique directly on the soundboard under the strings is also an option. This often produces a sharper “honky-tonk” sound.
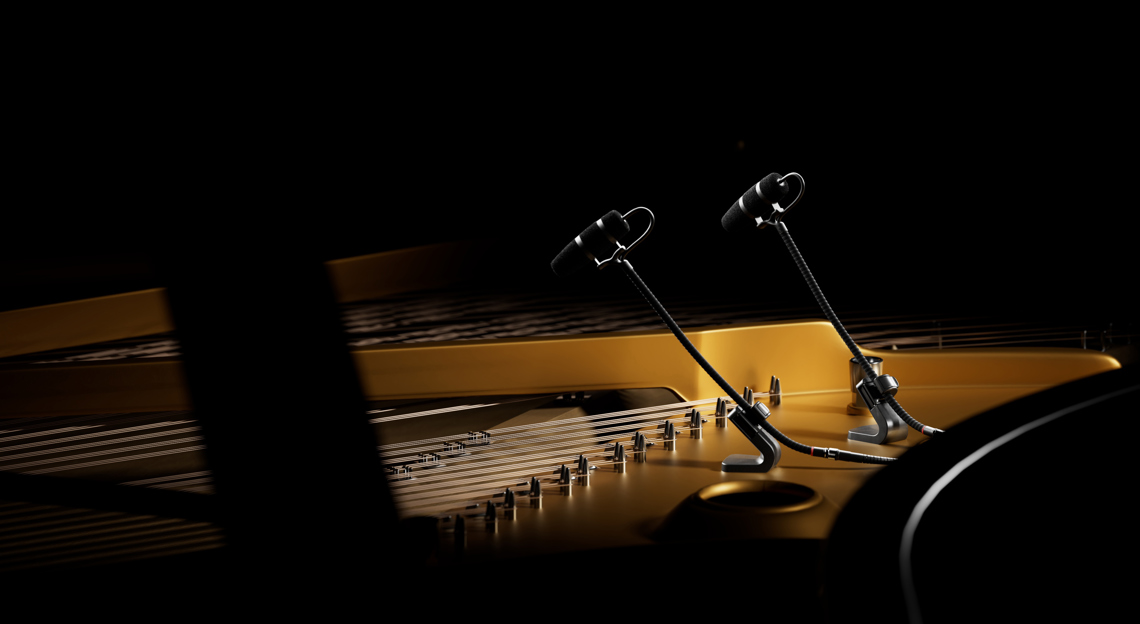
• Miniature omni mics can be hung over the strings i.e., 30-40 cm (12-16 in) by their integrated cables and the height/acoustic balance can be adjusted as needed. Hanging them slightly in front of the hammers, with approximately 30 cm (12”) between the mics ensures a well-balanced sound. A shorter distance between the mics can create a comb filter and longer distance will create a wider stereo image. Too far apart will generate a “hole” in the middle of the mix. Typically, this middle register is where most of the action happens in traditional classic or pop music.
DPA solutions
4061 CORE+ Stereo Microphone Kit includes boundary layer mounts for the PZM solution (BLM6000) as well as the DMM0007 Universal Surface Mount.
Summary
There are countless methods and positions but here are three of the most successful stereo set ups inside a grand piano are shown below.
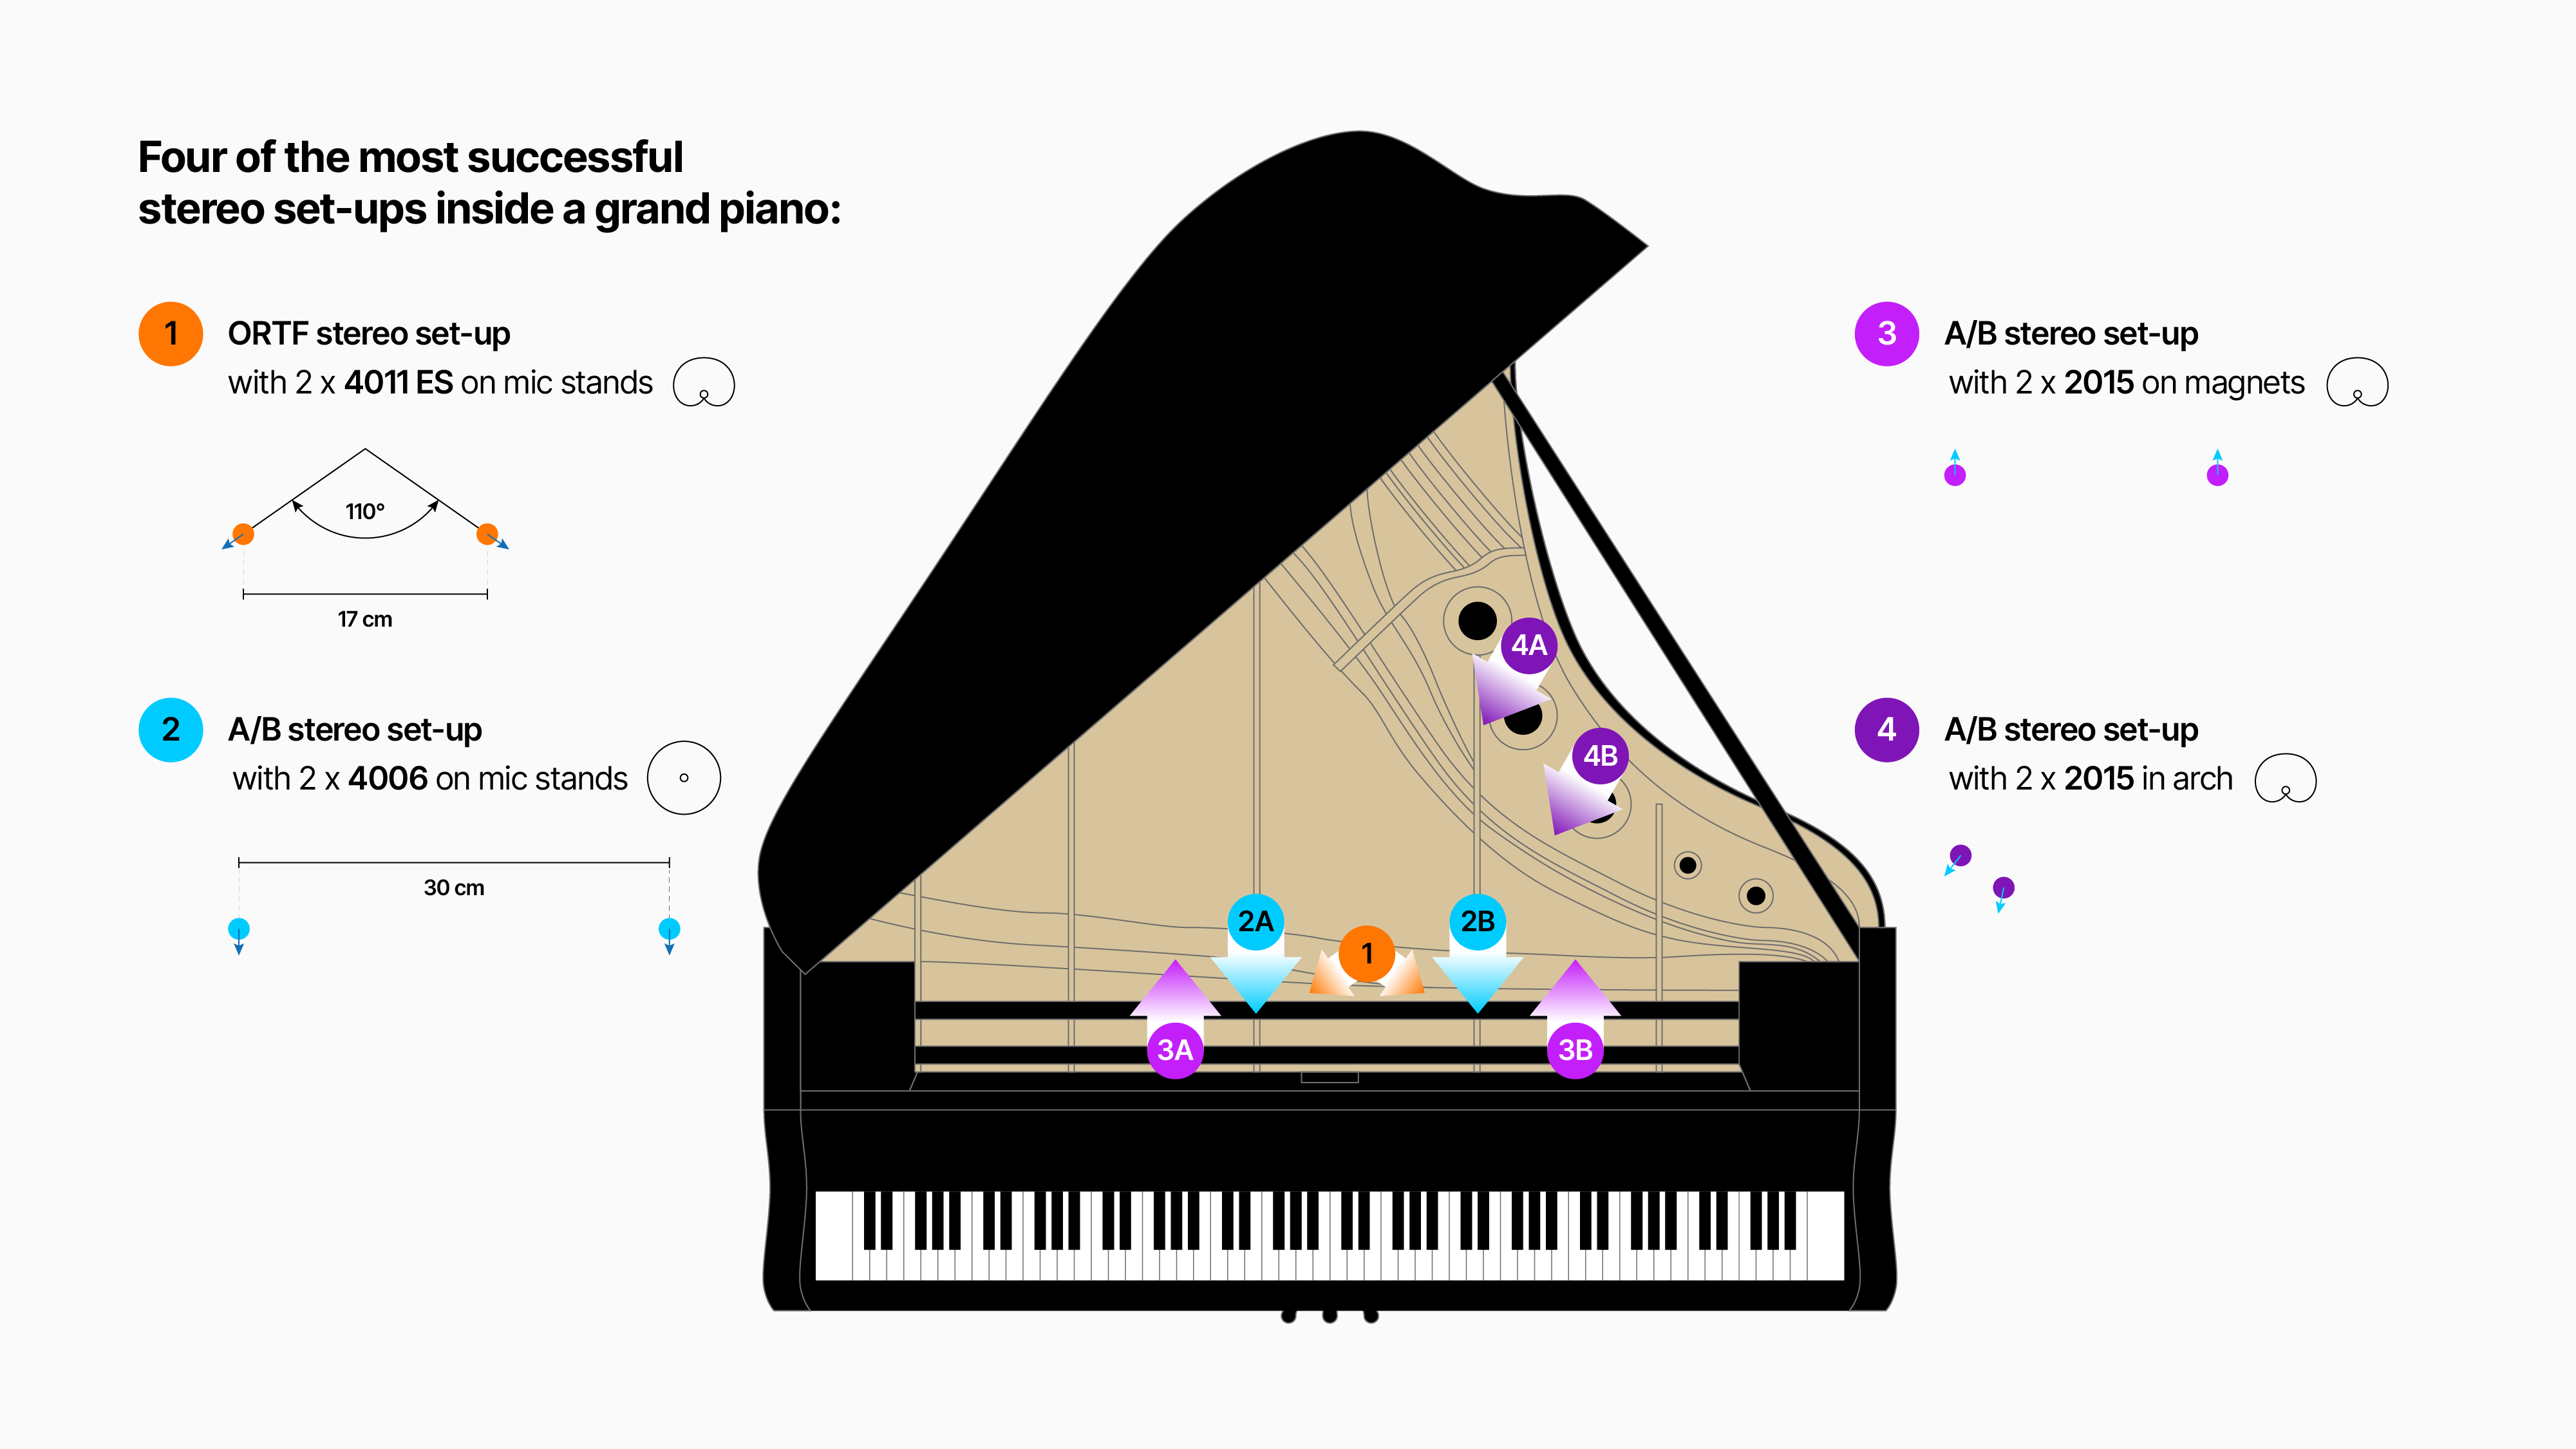
1. ORTF stereo set-up using cardioids approximately 30 cm (12 in) over the strings at mid frame. The mics should be pointed at 45° downwards, towards the pianist. Can be achieved with DPK4011 and the enclosed ORTF mount.
2. A/B with a pair of omnis 30 cm (12 in) over the strings. The 3506A Stereo Kit with Matched 4006A Omnidirectional Microphones or 3532-SP Stereo Kit with Matched 4041-SP Omnidirectional Microphones can be used to achieve this.
3. A/B with a pair of wide cardioids placed behind the piano on a music stand pointing away from the pianist. DPK2015 and the enclosed gooseneck mounts on magnets can be used.
4. A/B with a pair of wide cardioids placed in the arch on magnets. One is pointing towards the middle of the higher strings and the other pointing towards the middle of the lower strings.