Stereo recording techniques and setups
How to determine spacing and angling
Creating a stereophonic image with two microphones depends on the directional characteristics of the microphones, their angling and the distance between them. The aim is to create a level difference, a time difference or a combination thereof. From psychoacoustic research [1], we know which values to aim for. The art of it – and the science – is to create the right distribution of the sound between the loudspeakers. Other parameters like timbre and envelopment also are important. However, we will only look at the level and time that creates the right distribution across the standard loudspeaker setup as shown in fig 1.

Fig. 1 Basic setup for stereo listening
The result can be seen from the curves in fig. 2. If no time or level differences between left and right are present, the sound source is reproduced at 0° (hard center). To make a sound source appear at 30° off center (in the direction of one of the loudspeakers), the level difference between left and right channel should be approximately 15 dB. In addition, the sound is perceived as reproduced at 30°, if the time difference between the left and right channel is approximately 1.1 ms (milliseconds).
Additionally, a combination of the time difference and the level difference can act together. For instance, the sound will be perceived as reproduced at 30° if the signal in one channel is delayed by 0.5 ms and the level is approximately 6 dB below the other channel (see dotted lines in fig. 2).

Fig. 2 Inter-channel differences to provide specific directional information from a two-loudspeaker setup.
In fig. 2, the inter-channel differences adequate for 10° and 20° reproduction respectively are also shown.
Once quantified, this information can be combined with the directional characteristics of the mics in a two-microphone setup. Then, it is possible to determine the optimal positioning of the microphones for a stereo recording.
As mentioned, stereo recording is not just a question of reproduction at hard left or right. Naturally, the “in-between” distribution is important. Otherwise, angular distortion will occur. This is visually explained in fig. 3.

Fig. 3 Percepation of angular distortion.
The following information is based on the work of Michael Williams [2].
Setups for stereo: AB

Fig. 4 AB setup.
AB stereo recording is based on a spaced pair of omnidirectional microphones. On the boom, the microphones are mounted normally, keeping the housings in parallel.
The distance from the center of the thread to the centerline of the microphone boom can be read on the bar at the outer side of the two holders respectively, (fig. 4).

Fig. 5 The distance from the center of the boom is read on the outer side of the holder
The AB setup provides a pleasant reproduction of the reverberant sound field and provides useful spatial information. This setup takes advantage of the omnidirectional (pressure) microphones' rich low-frequency response. The directional information, however, is slightly less distinctive compared to other setups.
AB is generally not suitable for mono as the summed signal may suffer from comb filtering. (For mono, just use one of the channels).
The spacing between two omnidirectional microphones can be chosen from the curves in (fig. 6).

Fig. 6 Diagram to determine the distance between two omnidirectional microphones for the AB setup.
The scale on the horizontal axis indicates the time difference between the microphones in milliseconds and the
scale on the vertical axis indicates the position (width) in degrees of the sound source to be recorded.
Procedure
The first step is to select a distance between the sound source(s) and the microphone setup. Please note that the ideal distance from the microphone pair to the sound source depends on not only the type and size of the sound source and on the surroundings in which the recording is to be made but also on individual preference.
The balance between the direct sound and diffuse soundfield in a recording is of crucial importance. Therefore, considerable time should be used in establishing the optimal positioning of the microphones.
Be aware, that all directional information from the room will be reproduced in front of you in a 2-channel stereo playback system. Consequently, placement of the AB setup closer than initially expected may give a more appropriate direct-to-diffuse sound balance. It is also here the versatility of an AB Stereo Kit can be considered. Using the different acoustical modification devices for the microphones, the amount of ambiance and the tonal color of the recording can be adjusted without adding any noise. The choice of floor and ceiling mounting of the stereo boom gives you added flexibility when positioning the microphones. Remember also to listen via the microphones. The microphones way of picking up sound is different from your ears.
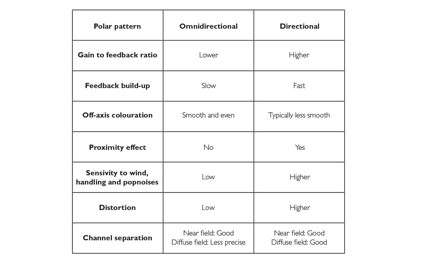
Omnidirectional microphones and AB Stereo are often preferred when the distance between the microphone and the sound source is large. This is because omnidirectional microphones can capture the true low frequencies of the sound source regardless of distance, while directional microphones are influenced by the proximity effect. Directional microphones will therefore typically exhibit a loss of low frequencies at larger distances.
Now we turn to diagram, (fig. 7): Measure the angle at which the sound source(s) can be observed, normally called the recording angle. If the total angle is 140° this should be referred to as ±70 °. Now, decide on the reproduction angle and find the related distance between the microphones.

Fig. 7 The diagram to determine the distance between two omni microphones for the AB setup.
Example: The recording angle is ±70°. The outer limits of the recording angle should be reproduced at ±30° (time difference approximately 1.1 ms). The crossing point is marked (•): Hence, the spacing (d) should be 40 cm (16 in).
Setups for stereo: XY

Fig. 8 XY setup
XY stereo recording uses a coincident pair of directional- or bidirectional, angled microphones. Hence, the directional information is obtained solely from the level difference between signals.
In practice, “coincident” means that the microphone capsules must be placed close and normally slightly above each other (fig. 8).
Please note: Avoid the microphones touching each other as this might cause mechanical noise. Fig. 9 shows a typical arrangement of two cardioid microphones on a boom.

Fig. 9 Mounting the microphones closely but without any physical contact.
The XY setup provides a stable directional image but produces a slightly weaker impression of space and reverb compared to the AB setup.
Be aware, that directional microphones exhibit low-frequency loss at larger distances and will result in a lack of richness and energy in sound color. Contrary to AB, there are no comb filtering effects summing XY signals to mono.
Procedure
In the most commonly used XY setup, a pair of first-order cardioid microphones is arranged at a 90° angle (±45°).
Other angles than 90° may apply for an XY setup, causing a change of the recording angle. If you want your sound image to fill-out the space between the loudspeakers, the rule is: The wider the sound source, the narrower the angle between microphones. Or: The more width-limited the sound source is, the broader angle between microphones.
The diagram below (fig. 10) shows the relation between microphone angles, position (width) of the sound source and reproduction angles. A red mark indicates coverage of 180° (±90°) sound source when the angle between the microphones is 90°. This is known as a standard XY-setup.
When recording a single source, a vocal for instance, do not try to stretch the sound image from speaker to speaker. In this case, the voice should stay right in the middle. The ambiance around the voice distributes across the front.

Fig. 10 Set of curves to determine the angle between two cardioid microphones for XY setup. The red dot marks the 90° standard angling between the microphones.
As mentioned, bidirectional microphones (figure-of-eight characteristic) are also used in XY setups. Fig. 11 shows a set of curves providing the relation between microphone angles, position (width) of the sound source, and reproduction angles. The red mark indicates the coverage of a sound stage being 70° (±35°) wide. The angle between the microphones is 90°. This specific setup is called the Blumlein-setup, described by the English engineer Alan Dover Blumlein. The idea for this setup came from his work with antennas (spotting submarines during WWII).

Fig. 11 Set of curves to determine the angle between two bidirectional microphones (or a particular arrangement utilizing four cardioid microphones) for XY setup. The red dot indicates the Blumlein setting.
Bidirectional antennas – and bidirectional microphones – are sensitive in two directions. However, if the front lobe is in-phase with the input, the back loop is, per definition, out-of-phase. Blumlein’s idea regarding the antennas was to take advantage of both level and phase to describe signals in a 360° view. When it comes to two-channel stereo-sound, basically only reproduction of the in-phase signals (±45°) is correct. Rear sounds (135°-225°) are presented in front of the listener. The sound fields on the sides are reproduced out of phase. Nevertheless, the Blumlein setup is popular because it provides a fair resolution of the frontal sound stage and adds some interesting ambiance.

Fig. 12
Fig. 12 Set of curves that show the level difference and phase between two bidirectional microphones angled ±45° (Blumlein) dependent on the sound source position. The dashed lines in the grayed area indicate that the reproduced sound is out of phase. The full line in the grayed area indicates that sound from the back is in phase and thus will be reproduced in the front.
Note: It is possible to create a figure-of-eight polar pattern from two cardioid microphones, see fig 13. The microphone pointing to the rear must be phase reversed (swap pin 2 & 3). The two microphones are routed to the same channel.

Fig. 13 Here, two cardioids replace a figure-of-eight microphone. Two microphone inputs are needed in principle. However, you can “cheat” by using a Y-sum cable with pin 2 and 3 reversed in one microphone connector.

Fig. 14 DUA0019 Spacer for microphone boom.
Setups for stereo: MS
MS is short for ("Mid/Side"). The principle was invented by the Danish sound engineer, Holger Lauridsen. In practice, the MS system has one cardioid microphone that points in the axial direction and provides the Mid signal, together with a microphone with a figure-of-eight characteristic that faces transversely and provides the Side signal. The convention is that the figure-of-eight microphone is oriented so that the in-phase side must face to the left.

Fig. 15 MS configuration
A simple conversion of the microphones' output creates a stereo signal from Mid-Side to Left-Right. The two signals M and S are passed through a matrix, where the left channel is derived by adding M and S (M+S), while the right channel consists of the S-signal subtracted from the M-signal (M-S), see figure x. (Performing addition in audio is what a mixer does: Summing output of two channels. In practice, subtraction adds two signals, where one is inverted (M+(-S) = M-S = R; M plus negative S equals R).
If not applying a matrix, it is possible to use a regular mixer and a Y-split on the S microphone. The M-signal is put into one channel and panned to the center. One part of the split S signal is put into a channel that is panned to the far left. The second part of the split S signal is inverted and put into a third channel and panned right. The output is now conventional stereo.
Another alternative is to use a matrix made up of two transformers. Typical off-the-shelf products for the purpose are line transformers with the gain ratio 1+1:1+1.
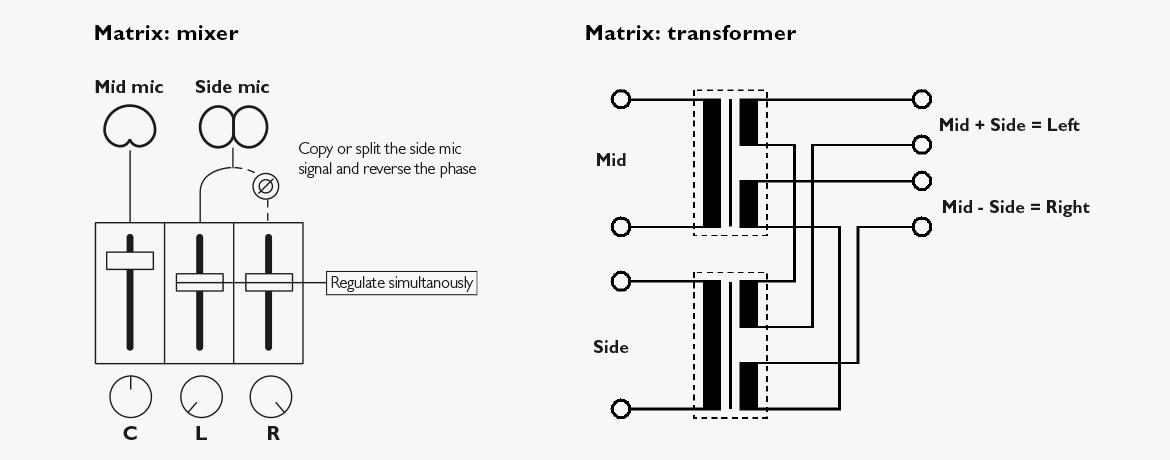
Fig. 16 MS matrix diagrams
Further, most DAWs contain matrix functions. Plug-ins are also available.
With MS, you can change the stereo width from hard mono to extremely diffuse out-of-phase sound in two channels. Furthermore, as the only stereo system, with MS, it is possible to increase the stereo width after you have made the recording - and even after you have matrixed to LR. The matrix equations look like this:

Dividing by √2 is the same as subtracting 3 dB from the sum or difference, i.e. (M + S) – 3 dB or (M – S) – 3 dB.
Procedure
Controlling the recording angle can be done in two ways, either by selecting a M-microphone different from a standard cardioid; it might be a wide cardioid (widening the recording angle) or by using supercardioid (narrowing the recording angle). Or: By varying the ratio between M and S. See Fig. 17 below.
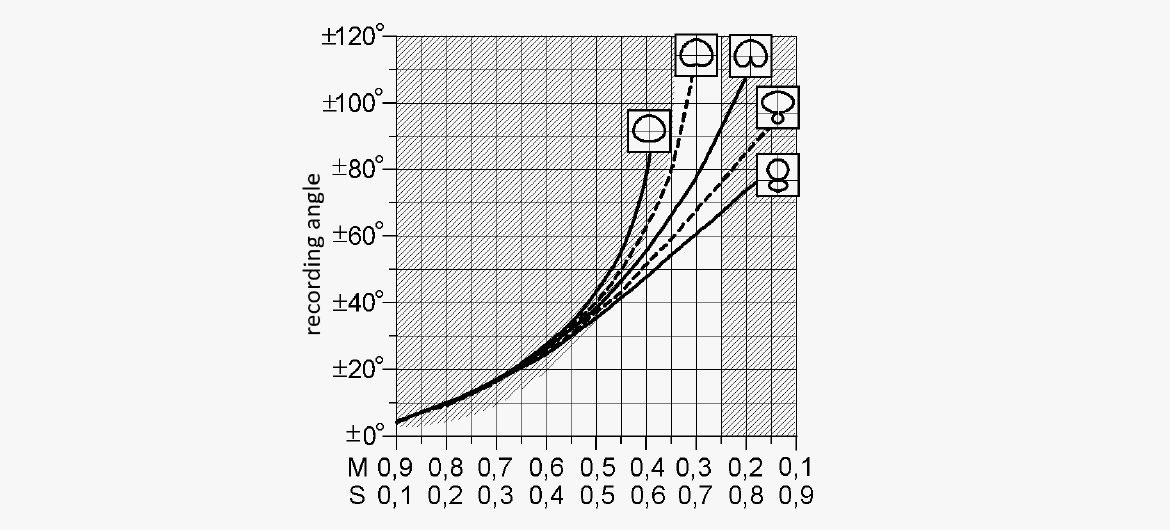
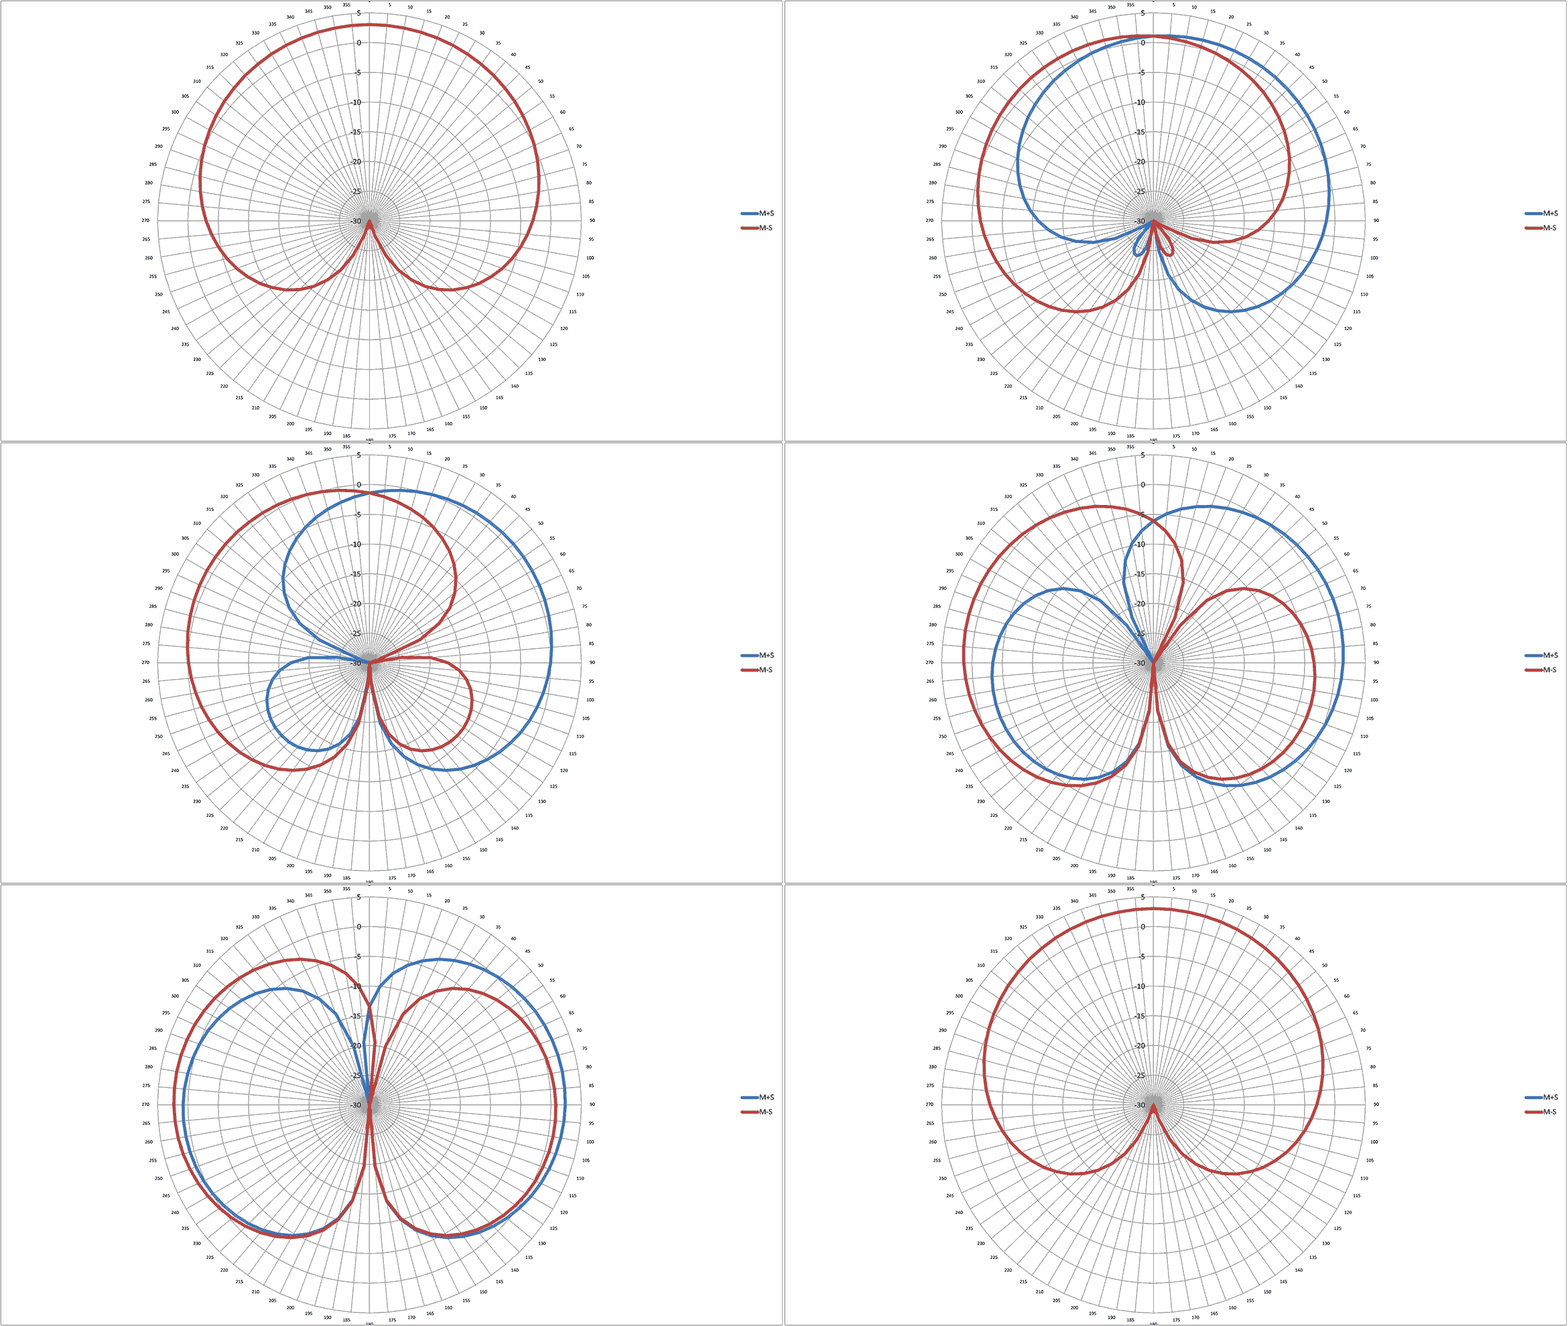
Fig. 17 Varying the ratio between M and S
The MS principle has several advantages:
- MS is the only stereo system where the width can also be controlled (±) after recording
- MS is coincident and mono compatible (in that sense, the S-signal cancels out when summed to mono)
- With MS, one microphone points directly in the main direction. (In other systems, the main direction is covered by the microphones off-axis)
MS should not be compared with XY because MS consistently exhibits a null at 180°, and the mono content is determined by one cardioid microphone (XY mono is a sum of two angled cardioids).
Setups for stereo: Near coincident
It is possible to combine the principles of AB and XY in setups normally referred to as “near coincident”. Some successful configurations are named after the institutions that described them first, like ORTF (Office de Radiodiffusion Television Francaise), NOS (Nederlandse Omroep Stichting), DIN (Deutsches Institut für Normung), etc.
The advantage of near-coincident techniques is the combination of good ambient reproduction with precise image positioning.
Whichever the technique, the microphone capsules must point away from each other since the left microphone must reproduce left information earlier and louder than the right microphone and vice versa.
Procedure
When defining the position of the stereo image it is easy to place the outer limits - the “edge” of the image - and it is easy to place the center. However, in between the center and the outer edge, there may occur a small misplacement, typically 4-10°; this is called angular distortion. One of the advantages of the near-coincident setup is the possibility of minimizing the angular distortion — figures 12 and 13 show how microphone spacing and angling can be selected individually. The scale on the horizontal axis is related to spacing and the vertical scale is related to angling. On each curve, some circled figures are shown indicating the theoretical angular distortion of the different combinations of distance and angle.

Fig. 18 Example, cardioid microphones: A recording angle of ±70° can be achieved by spacing the cardioid microphones 20 cm (7.87 in) and by a 50° angling. The angular distortion is marked by circles containing a number: The max deviation from the optimum angular position.

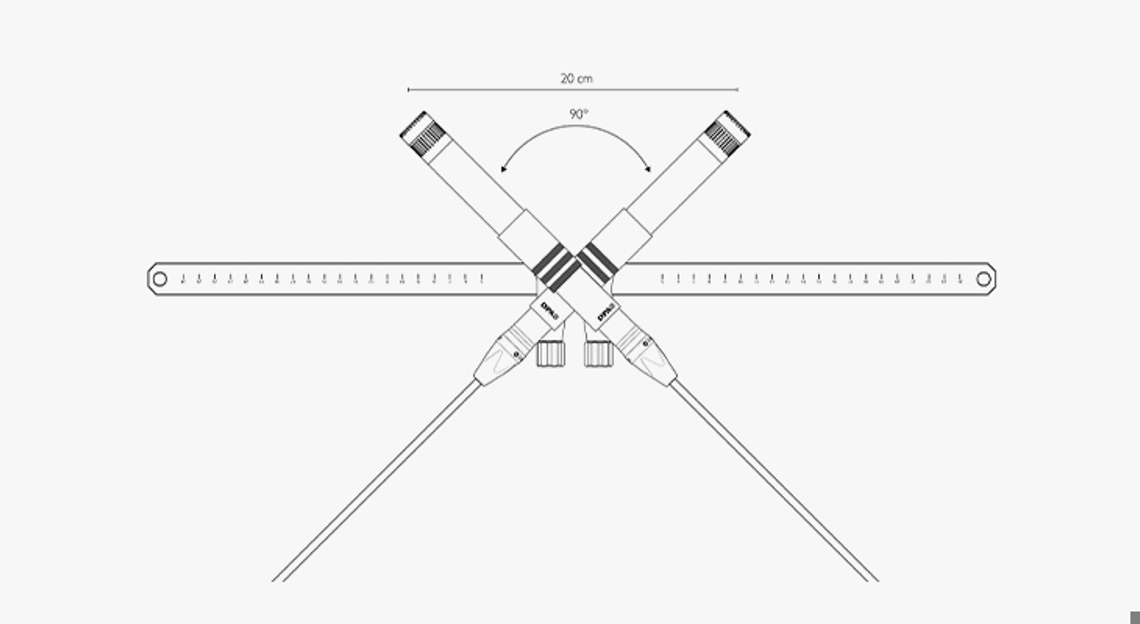
Fig. 19 Example, wide cardioid microphones: A recording of ±70° can be achieved by spacing the wide cardioid microphones 20 cm and by a 90° angling.

Fig. 20 The XLR may in some cases be used as an extension of the housing.

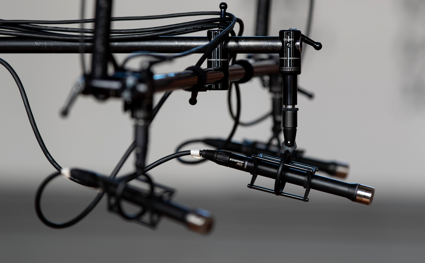
Fig. 21 Near-coincident setup applying shock mounts on the boom.
Setups for stereo: ORTF

Fig. 22 ORTF setup.
This setup uses two first-order cardioid microphones spaced 17 cm (7 in) and angled ±110°.
The idea behind this technique is that it is well suited for reproducing stereo cues that are similar to those that are used by the human ear to perceive directional information in the horizontal plane. The spacing of the microphones emulates the distance between the human ears, and the angle between the two directional microphones emulates the shadow effect of the human head.
Procedure
The ORTF stereo technique provides the recording with a wider stereo image than XY stereo while still preserving a reasonable amount of mono information. Be aware, that directional microphones exhibit low-frequency loss at larger distances and will result in a lack of richness and energy in sound color.
In recording a grand piano, for example, placing the ORTF setup in the curve of the pianos with the lid on “full stick” will usually produce a very direct sound and a good balance between the low key and the high key sound of the instrument.

Fig. 23 The ORTF setup marked in a general diagram for cardioid microphones for XY setup.
Setups for stereo: DIN

Fig. 24 DIN stereo.
DIN stereo uses two first-order cardioid microphones spaced 20 cm (7.8 in) apart and angled at 90° to create a stereo image .
The DIN stereo produces a blend of intensity stereo signals and time delay stereo signals, due to the off-axis attenuation of the cardioid microphones together with the 20 cm spacing. Be aware, that directional microphones exhibit low-frequency loss at larger distances and will result in a lack of richness and energy in sound color.

Fig. 25 The DIN setup marked in a general diagram for cardioid microphones for XY setup.
Procedure
The DIN stereo technique is more useful at shorter distances, for example on piano, small ensembles or used for creating stereo on an instrument section in a classical orchestra.
When recording a choir, for example, the perfect balance between the direct and the diffuse sound field, using cardioid microphones, can be accomplished at a distance that leaves you with a recording angle of approximately 100°. The reproduced image of the choir should be evenly distributed between the left and the right loudspeaker.
Setups for stereo: NOS

Fig. 26 NOS setup.
The NOS Stereo Technique uses two first-order cardioid microphones spaced 30 cm (11.8 in) apart and angled at 90° to create a stereo image, which means a combination of difference-in-level stereo and difference-in-time stereo.
Be aware, that directional microphones exhibit low-frequency loss at larger distances and will result in a lack of richness and energy in sound color.
Procedure
When making an overhead recording of a drum kit, you might want to create a widespread image. In this case, the NOS setup is a good solution and can be achieved by simply placing the microphones approximately 50 cm (20 in) above the cymbals.

Fig. 27 The DIN setup marked in a general diagram for cardioid microphones.
Important accessories for stereo recording
Stereo booms
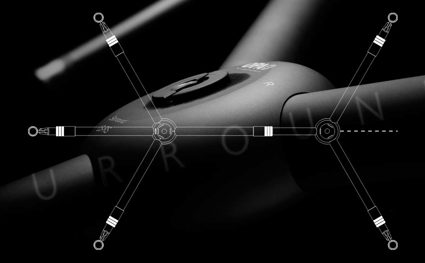
Error loading Partial View script (file: ~/Views/MacroPartials/TaggedProducts.cshtml)The UA0836 Stereo Boom is a precision-crafted microphone boom for easy and secure mounting of microphone pairs for stereo recording. It can be precisely adjusted for both spacing and angling of the microphones.
The boom can be mounted on a stand or suspended from wires. It has centimeter graduations on the boom and angle graduations on the microphone holders for precise, quick and easy configuration of the recording setup.
The UA0897 Shock Mount can also be used with it.

Fig. 28 UA0836 Stereo Boom with holders.
Error loading Partial View script (file: ~/Views/MacroPartials/TaggedProducts.cshtml)The SB0400 is a lightweight stereo boom – with or without shock mounted microphone holders – addresses the need for quick, precise and repeatable ways to switch between different setups.
The shock mounts included in this solution hold both omnidirectional and directional microphones – compact as well as larger. Based on the Rycote® Lyre™ suspension system, almost any microphone can be used simply by adding another Lyre™ rubber piece.
Markers indicate parallel microphones positioning plus 90° and 110° offset for XY an ORTF configurations. A central base with a rotary joint allows the microphones to be angled equally. The Stereo Boom has hooks for suspending the boom in wires.
SB0400 is 40 cm (1.3 ft) long. More holders can be attached to it for mounting more than two microphones.
For the arrangement of a coincident XY stereo or near coincident (including ORTF or NOS) stereo configuration, the stereo boom can be fitted with two directional microphones and DUA0019 Spacer for Stereo Boom.
The lightweight stereo boom SB0400 is an alternative solution.

Fig. 29 SB0400 Lightweight Stereo Boom without holders.
Accessories for the microphones
Acoustic Pressure Equalizers
Acoustic Pressure Equalizers – APEs – are passive acoustic processors functioning as both spatial and spectral equalizers. They use diffractions on the surface to modify the sound field near the microphone diaphragm. This technique is only possible on omnidirectional pressure microphones.

Fig. 30 Acoustic Pressure Equalizers.
When using an APE, two primary changes occur:
1. An upper-mid-range/high-frequency boost (without changing the low end) due to the pressure build up at certain frequencies depending on the element’s size
2. More directionality at higher frequencies (focus)
A presence (upper-mid-range) lift is often desirable in rhythmical genres, to make a voice or an instrument cut through a mix or simply to make it more intelligible or well defined. For symphonic music, the frequency response of certain legendary vintage types of microphones can be obtained using one of the APEs. However, you will achieve a much higher degree of naturalness and detail when using a precision handcrafted 4006 Omnidirectional Microphone.
Nose Cone
A nose cone gives your microphone a perfect omnidirectional response across the whole audio frequency range. It counteracts the directional characteristics that omnidirectional microphones exhibit at higher frequencies. It also guarantees an even tonal balance of sound arriving at all angles of incidence but without a high-frequency boost on axis.
The Nose Cone is specially designed for use with 4006 Omnidirectional Microphone variants.

Fig. 31 Nose Cone for 4006 Omnidirectional Microphone.
This nose cone is especially suitable for increasing the ambiance to your recordings or for miking a variety of sound sources that are positioned around the microphone.

Fig. 32 UA0897 Shock Mount.
Error loading Partial View script (file: ~/Views/MacroPartials/TaggedProducts.cshtml)Wind screen
The windscreen provides excellent protection against wind and pop noises without attenuating the higher frequencies beyond the tolerance field of the microphone's frequency response. It is well suited for outdoor applications and for speech and singing at short distances. The windscreen is specially designed for compact mics, for example on floor stands.

Fig. 33 Windscreen DUA0020 for DPA 19 mm microphones.
Error loading Partial View script (file: ~/Views/MacroPartials/TaggedProducts.cshtml)Mounting the microphones
Mounting on a stand
Simply use the centered standard microphone thread or connect using the 3/8” NS27 thread adapter supplied.

Fig. 34 Mounting the boom on a microphone stand.
Suspension
Suspension of the boom is easily made by using the fly eyelets at the ends of the bar. Position the holders up-side-down to obtain balance.

Fig. 35 Flying the boom on wire.
Kits for stereo recording

3532-SP Stereo Kit with DPA 4041 Large Diaphragm Microphone
Error loading Partial View script (file: ~/Views/MacroPartials/TaggedProducts.cshtml)
3506A Stereo Kit with 4006A Omnidirectional Microphone
Error loading Partial View script (file: ~/Views/MacroPartials/TaggedProducts.cshtml)
3511A Stereo Kit with 4011A Cardioid Microphone
Error loading Partial View script (file: ~/Views/MacroPartials/TaggedProducts.cshtml)
3511ES Stereo Kit with 4011ES Cardioid Microphone
Error loading Partial View script (file: ~/Views/MacroPartials/TaggedProducts.cshtml)
ST2011A Stereo pair with 2011A Twin Diaphragm Cardioid Microphone
Error loading Partial View script (file: ~/Views/MacroPartials/TaggedProducts.cshtml)
3515A Stereo pair with 4015A Wide Cardioids Microphone
Error loading Partial View script (file: ~/Views/MacroPartials/TaggedProducts.cshtml)Suggested microphones & accessories
AB Stereo
Error loading Partial View script (file: ~/Views/MacroPartials/TaggedProducts.cshtml)- 3532-SP Stereo Kit with 4041 Omnis*
- 3506A Stereo Kit with 4006A Omnis
- 4006A Omnidirectional Microphone
- 4041-SP Omni Large Diaphragm Microphone*
* Since the 4041 Large Diaphragm Microphone is not completely omnidirectional at higher frequencies and has an on-axis upper mid-range frequency lift, the perceived directionality will change compared to most other omni microphones. It calls for a little deviation from the graphs shown. For positioning circumstances, the 4041 can be considered as a wide cardioid microphone (fig. 16).
The same considerations must be done if applying Acoustic Pressure Equalizers (see fig. 27) in connection with 4006A Omnidirectional Microphones. These accessories provide increased directional information.
XY Stereo
Error loading Partial View script (file: ~/Views/MacroPartials/TaggedProducts.cshtml)- 3511A Stereo Kit with 4011A Cardioids
- 3511ES Stereo Kit with 4011ES Cardioids
- ST2011A Stereo pair with 2011A Cardioids
- 4011A Cardioid Microphone
To keep identical vertical aiming of the microphones, the DUA0019 Spacer for Stereo Boom (fig. 14) should be used.
Near coincident
Error loading Partial View script (file: ~/Views/MacroPartials/TaggedProducts.cshtml)- 3511A Stereo Kit with 4011A Cardioids
- 3511ES Stereo Kit with 4011ES Cardioids
- 3515A Stereo pair with 4015A Wide Cardioids
- ST2011A Stereo pair with 2011A Cardioids
- 4011A Cardioid Microphone
- 4015A Wide Cardioid Microphone
- UA0897 Shock Mount ***
* Since the 4041 Large Diaphragm Microphone is not completely omnidirectional at higher frequencies and has an on-axis upper mid-range frequency lift, the perceived directionality will change compared to most other omni microphones. It calls for a little deviation from the graphs shown. For positioning circumstances, the 4041 can be considered as a wide cardioid microphone (fig. 16).
*** When using the UA0897 Shock Mounts, it may be necessary to use the female XLR connector on the cable in one of the rubber mounts since the shock mounts take up more space than the normal holders (fig. 17 & 18).
ORTF Stereo
- 3511A Stereo Kit with 4011A Cardioids
- 3511ES Stereo Kit with 4011ES Cardioids
- ST2011A Stereo pair with 2011A Cardioids
- UA0897 Shock Mount **
** If using the UA0897 Shock Mount, additional XLR extension units must be applied as well, see fig. 18. The sliders are marked for the ORTF angular position.
DIN Stereo
- 3511A Stereo Kit with 4011A Cardioids
- 3511ES Stereo Kit with 4011ES Cardioids
- ST2011A Stereo pair with 2011A Cardioids
- UA0897 Shock Mount **
** If using the UA0897 Shock Mount, additional XLR extension units must be applied as well, see fig. 18. The sliders are marked for the ORTF angular position.
NOS Stereo
- 3511A Stereo Kit with 4011A Cardioids
- 3511ES Stereo Kit with 4011ES Cardioids
- ST2011A Stereo pair with 2011A Cardioids
- UA0897 Shock Mount **
** If using the UA0897 Shock Mount, additional XLR extension units must be applied as well, see fig. 18. The sliders are marked for the ORTF angular position.
References
[1] Simonsen, Gert. Doctoral thesis. Technical University of Denmark.
[2] Williams, Michael: The Stereophonic Zoom. 1991. Published by author.
