Is there a unique microphone technique for streaming? Not really. However, often live streaming is characterized by transmission involving the smallest workforce possible. The rule is, therefore, “safety first.” Here we talk about best practice microphone techniques.
What is your setup?
The more straightforward setup you use, the more you must consider your microphone techniques. For example, a single microphone is sometimes connected directly to the streaming device or laptop.
1. Make sure there is sufficient power for your microphone (i.e.,
Phantom power for XLR-mics or 5 volts DC for miniature mics). Most microphone inputs on laptops (mini-jacks) do not provide adequate power for quality microphones. If that is the case, you should use a sound card or a
preamp with a USB connection to deliver the power needed.
2. Make sure the gain setting is sufficient. If it is too high, the sound may get distorted. If it is too low, any additional gain (for instance, AGC, Automatic Gain Control, or wrongly adjusted compressors) may emphasize system noise or result in “pumping” effects that don't sound good.
Suppose you use any kind of automatic mixer applying multiple mics. In that case, you must consider a perfect balance between the sound sources, so each microphone channel opens and closes at the right time. (Again, it is a question of level setting). Try it out very thoroughly before going on air!
In-your-face microphones
Many live-streamers prefer one single microphone right in front of them. Apply a proper suspension for a fixed position and keep vibrations out of the mic. Use a shock mount that fits the specific mic, or it will still transmit vibrations. Also, use a pop filter if the microphone is sensitive to blows, which is the rule for many directional types. Finally, remember to keep a constant distance to the microphone for a constant bass-balance (
proximity effect).
Less is more
If you use more than one microphone, each microphone signal should be different from that picked up by other microphones, especially if the transmission is in mono; this rule ensures you avoid so-called
comb-filtering, a
disturbing coloration of the sound. Thus, use as few mics as possible.
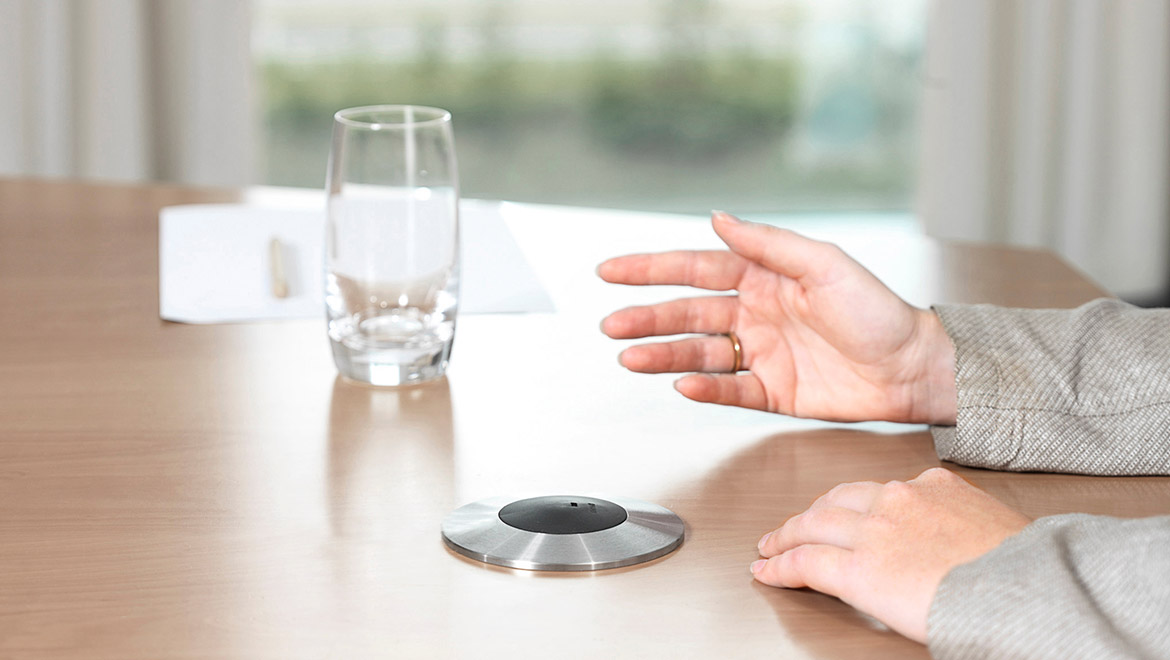
In an interview setting with two or more persons, consider whether a single microphone can do the job, for instance, a boundary layer microphone on a table that collects sound in all directions.
If it is preferred to use one microphone per person, then the mics should be the closest possible to each person. In a roundtable discussion, try to instruct attendees to keep their voices at the same level.
Microphone distance
Always consider the distance between the sources and the microphones. As already mentioned, it is often best to keep the microphones close to the people speaking. However, if you move your head away from the mic, the SPL at the mic drops fast. If the sources are moving, place the microphones at some distance (30-60 cm/1-2 ft.) from them. This reduces the level-variation. This applies if the room is relatively dead.
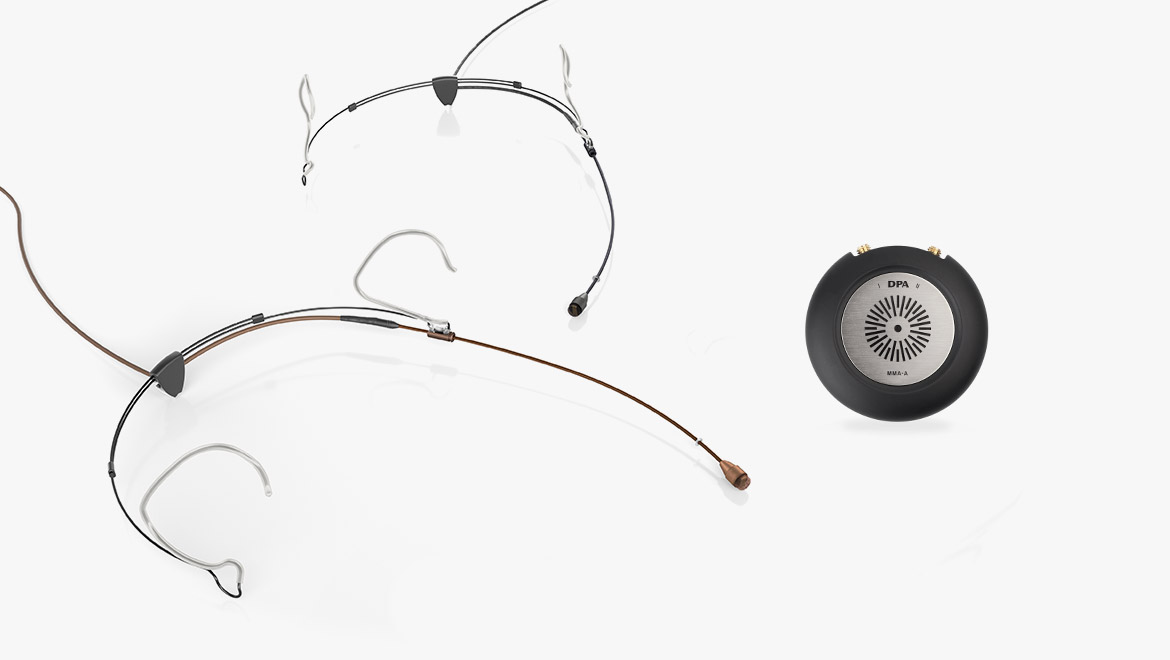
A better solution is to put a microphone on each of the speakers. A headset microphones or lavalier works very well. In addition, a well-adjusted compressor can help to keep levels constant.
When transmitting
a choir or acoustic band, the microphone distance should be close enough to hear the singing or the instruments, but sufficiently far away to obtain a homogenous sound. If you are close to the sound sources, use microphones with a wide pick-up angle like omnis or wide cardioids. If you must put the microphones far away for some practical reasons, choose more directional microphones like cardioids or super cardioids.
Speech intelligibility
Speech intelligibility is always essential. If you want a
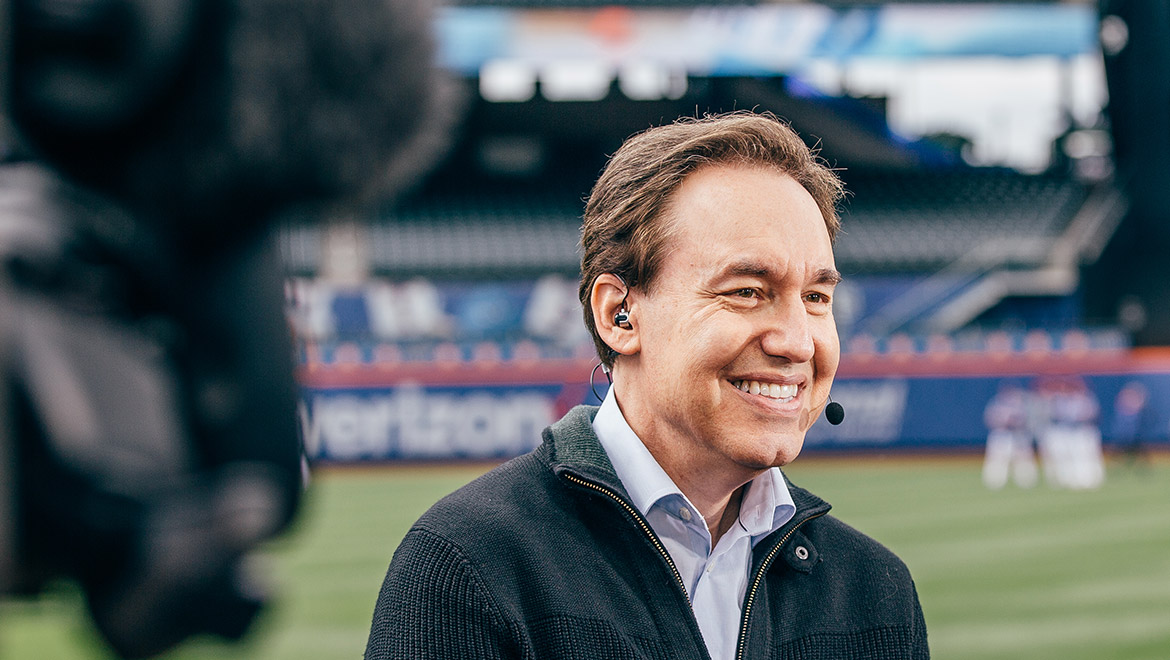
clean and highly-intelligible speech pick up, put the microphone close to the person talking. If the person talking moves around or makes excessive head movements, then put the microphone on that person. Again, a headset microphone is a convenient and almost invisible solution.
Make sure to avoid heavy breathing and any vocal or nasal blowing into the microphone. In situations that the speaker has a wide mouth, pull back the microphone to a position where the sound is stable, and no blowing occurs.
Remember that directional microphones are more sensitive to wind/blows/pop noise than omnis. Also, the sound of a directional headset mic is much more dependent on the microphone fixation. However, the headset microphone provides hands-free operation.
If using lavalier mics, remember that the voice level typically is three times lower (-10 dB) than the voice picked up by a headset. Also, due to the chest position, there is a dip of frequencies around 2-4 kHz. This dip must be compensated for (eq +10 dB in this range) to keep intelligibility high.
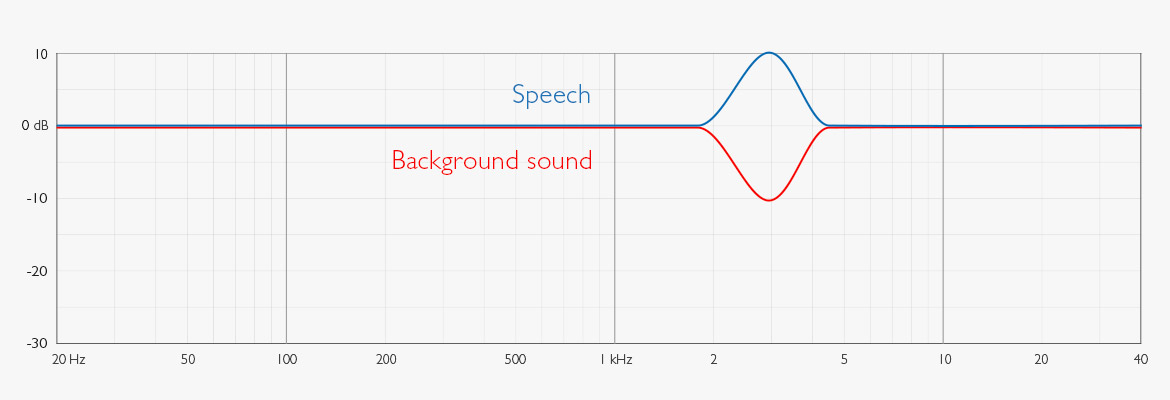
Further, when speech is transmitted, avoid loud background sound. You may improve the speech intelligibility by attenuating the background sound in the 2-4 kHz range to make speech consonants survive.
Matching images and audio
When working in mono, the task is usually to make the audio follow the video, meaning what is in the picture should be in the sound. If the image is close-up, the sound should be close-up as well. If the image is distant, so is the sound.
When working in stereo, make sure there is no left/right confusion. Also, match the reverberation with the perception of room size.
Continuity
In your streaming, continuity is essential – no drop-outs, please. This rule goes especially for the sound. If the sound is dropping out, the listener may think that something is wrong. If the mixing process is a little hectic, it is an advantage to install an additional room microphone (if you have a spare channel). This microphone is kept open at a low level, approximately 15 dB below the program, always keeping the audio line alive.
Conclusion
At the end of the day: Use decent mics; if the mic sounds terrible, so does your stream.
Related content